Recently I’ve taken up maintenance on my 20 year old car. I’ve wanted to do this for a long time and have done a few small jobs over the years, but acquiring the tools to do anything larger is a bit of an investment I’ve been working up to. It’s been interesting seeing how simple some scary-sounding mechanical jobs can be and applying my knowledge of electrics and computers to vehicle systems.
Having fixed a lot of other problems that all occured around the same time I was left with a single fault code on the airbag (SRS) system which is permanently stored and unable to be reset by regular diagnostic tools. Let’s take a look at what’s involved in repairing this ourselves!
A car computer primer
Before starting I should acknowledge that most of this information comes from Fiat’s own service documentation for my car, eLearn. I think this is intended for dealers rather than the general public, but it provides comprehensive information and guides for every part of the vehicle. For example, here is an overview of the electrical system in my car.
Any reasonably modern car will include multiple computers to run and monitor the cars many systems and communicate back to the driver – showing the outside temperature, how much fuel you have, and of course illuminating the dreaded error light.
My car is a 2004 Fiat Idea so it’s of course quite rudimentary by modern standards, but it still has several computers. King of the computers is the body computer which sits behind the dashboard on the passenger side and is basically the junction for all the other computers.
In addition to modules like the power steering and ABS system, the two other main computers are the engine computer which controls and monitors the engine, and the airbag computer which monitors collision sensors on the vehicle and fires the safety devices if it detects a crash. In my car – and I believe most – the airbag computer is mounted to the floor under the dashboard, often in the middle of the car.
All these components communicate via a simple two wire serial network called the CAN bus which allows high speed communication with minimal wiring. In fact my car has two CAN’s running at different speeds multiplexed by the body computer.
The standardised diagnostic OBD-II connector gives us access to the CAN bus to communicate with the car’s computers. You can monitor real-time engine and sensor stats and tune behaviours as well as reading and clearing fault codes. OBD-II interfaces are cheap, readily available, and come in different flavours like Bluetooth and WiFi if you don’t want to be tethered to the car by a cable.
Depending on your car you may need adaptor cables to access different systems in the car, but my Fiat is miraculously simple and let’s us talk to everything with a basic ELM327 device which cost about £15. Cheaper ELM327 devices can be had for single-digit pounds but they will likely only communicate with the engine computer.
What’s the problem?
Earlier this year my car battery died. This wasn’t uncommon as I didn’t work far from home with the frequent short trips claiming several batteries over the years.
But unfortunately this time around the car lit up the airbag error light whilst trying to get it going one morning. At the time I assumed this was the classic problem – which I’ve had before – of the wiring/connector under the seats getting knocked and disconnecting one of the airbags.
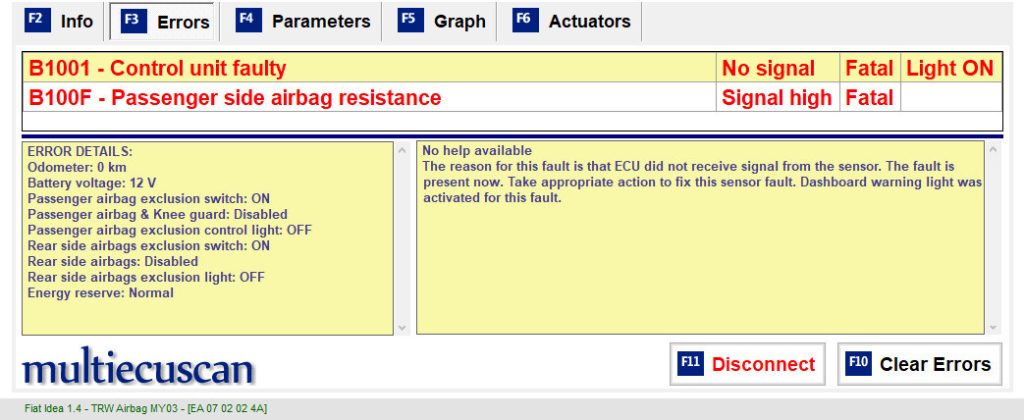
When I checked the airbag errors there was something far worse – a code B1001, “Control Unit Faulty”.

Above I’m using the Windows software MultiEcuScan (formerly FiatEcuScan) which supports a long list of mostly Italian cars. It can do a lot for free, and the paid version is affordable at €50. Check the vehicle support list to see what kind of cables and adaptors you need to access parts of your car.
Most error codes can be cleared – the B100F also shown is due to the seat wiring, and once that’s fixed we can clear the error – but not B1001. This is a permanent error code, in the same way a unit that’s been involved in a crash permanently remembers it’s been in a crash.
I’ve come to learn this can be triggered by low voltage from a dying battery which is probably what happened to me.
So… options?
It’s just a computer right? Then there’s always a way.
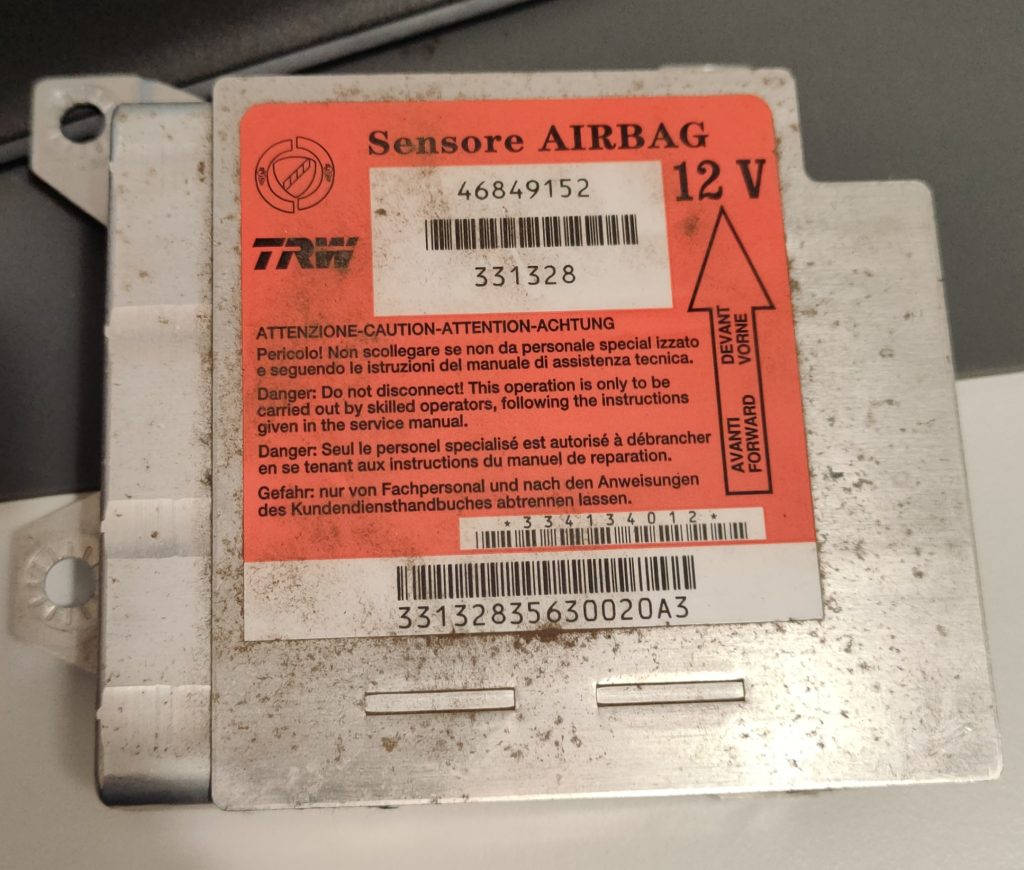
Fault codes must be stored on some memory inside the unit, so first order of business is to recover the controller and see what’s on the circuit board.

I had some difficulty working out how to get in to this controller. Most examples I found online were screwed and glued shut but mine had no visible fixing. The main body looked like a solid piece, with the plastic connectors sticking out one end and an additional metal plate attached to the top and bottom.
I assumed the insides would pull out with the connectors and also that the two dimples on the edges of the unit were some sort of press fit.
Eventually I discovered some photos of a similar unit that lacked one of the metal plates and exposed more indents on the top. While a little bit of the plastic around the connectors had to be snapped away, in the end access was simply jamming pry tools in the gap between the case and connectors underneath all the indents.

The circuit board inside is dominated by large capacitors which store a charge while the vehicle is operating so that the airbags can be fired in the event of power loss.
But on the back we find a familiar looking 8-pin chip… is that an EEPROM?

It sure is! A 16Kb Atmel AT25160.
It turns out airbag controllers use standard SPI/I2C EEPROMs to store persistent data including error codes. All we need to do is clean the ROM and rewrite it.
Falsifying memories
There are software packages out there to fix this kind of thing but they’re specialised tools and cost hundreds or thousands. Luckily, kind souls on the internet are willing to share these tools.
I posted my EEPROM dump asking for help and had a response in about a day.
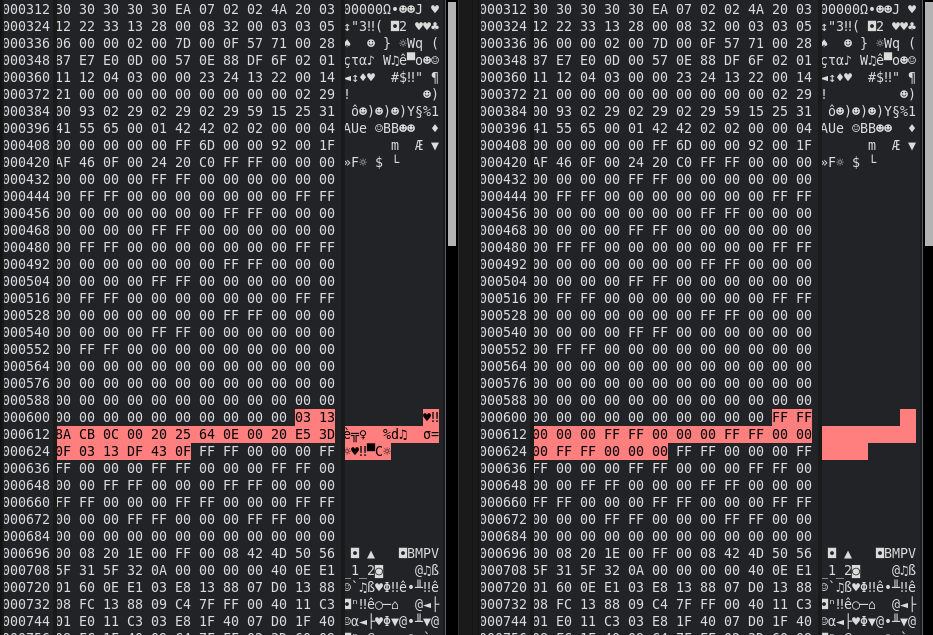
Comparing the before and after dump we can see only a few bytes have changed. I would guess this large region of FF / 00 is for storage of different fault codes.

I reprogrammed the EEPROM using an inexpensive CH341A and AsProgrammer on Windows – I tried flashrom on Linux initially but it doesn’t support the AT25160, and the no-effort solution was to start a Windows VM and do it from there.
When I reinstalled and checked the unit the B1001 was gone, even if moving the wiring had caused another fault for high resistance on an individual airbag. I’ve now fixed that other issue and MultiEcuScan is happy, as are the lights on the dashboard.

Once I’d verified the unit was working I removed it and ran a bead of silicone around the connectors to make it water tight, as the plastic I had to remove to open it meant the old seal would not be effective.
In conclusion
If you have the stomach for it, it turns out you can make car go vroom all by yourself!
When I initially researched the B1001 fault code I was horrified at having to spend more than the car’s worth on a new airbag controller. That swiftly changed when I found they used regular EEPROMs to store the data which could be overwritten.
While opening my airbag controller was a bit messy and necessitated some damage it seems like most units are much simpler to work with, so you may find it even easier.
Of course massive thanks to the wizards at Digital Kaos who actually fixed my EEPROM dump, and a shout out to the good people at Fiat Forum who always try to help with my many vehicular problems.
Here’s to many… or at least a few more years of motoring in my car!